Kids Paper Weaving
Weaving is one of my favorite projects to do with kids. The best part is that you can customize the project for different ages!
At my elementary school, we use Journeys as our main literacy curriculum. My 2nd grade classes don’t get excited about every anchor text that Journeys provides, but they do have a few favorites. The Goat in the Rug is one of their very favorite stories. (If you’ve never heard of it, you can go here to see a read aloud of the story.) In the story, we learn about the process that Navajo weavers go through to weave one of their famous and unique woolen rugs. This is one story that I love to expand on, and I’ve found that the kids are really interested once we dive into the process of weaving. (If you want to read more about how I expand the lesson then click here or go to the end of this post.)
So how do you get kids to understand what’s happening on a loom with those tiny strands of wool? Well it turns out, you can easily make a paper loom and weave it with paper strips. This is a great introduction to weaving project because the kids can see what’s happening on a bigger scale. To start the project you will need:
- Cardstock
- Ruler
- Marker
- Scissors
- Colored paper
- Glue stick
Now, the amount of prep you do for the students depends on your age group. If you are doing this with 5-6 year old students then you’re going to want to cut the loom for them and make the strips wider. 7-9 year olds should be able to cut the loom as long as you have set up the lines for them (some might even be able to measure their own lines for the loom, but in my experience most of them at this stage aren’t quite there). 10+ students will probably be able to do the project from start to finish without modification.
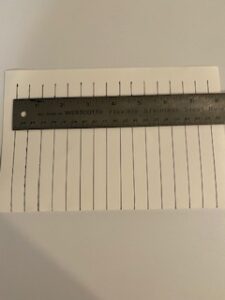
Step 1: Mark the loom
Take your ruler and marker and fold your cardstock in half hamburger style with the crease at the bottom. Use your ruler to mark 1/2 inch spaces across the top of the paper, making sure that there is an inch of space left at the top of the page. Then use the ruler as a straight edge and trace vertical lines all the way down the to the crease at each mark. When you are done it should look like this:
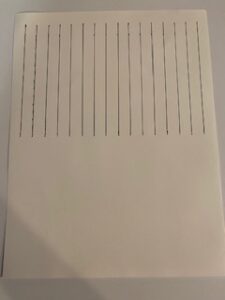
When I do this with my class, I make one loom this way and then unfold and copy it onto cardstock for however many students I have. That way the students will get a loom that is ready to fold and cut. It looks like this:
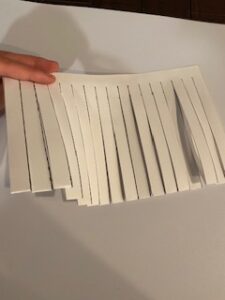
Step 2: Cut your paper strips
This is a great time to break out all of those odds and ends of colored paper that are left over from previous projects. You’re going to need 12-15 strips of paper per student (unless you are using wider paper for the littles, then you will need less). Each strip needs to be long enough to be at least the width of the loom (8.5 inches for standard cardstock) and it can be longer if needed because it can be trimmed-in fact longer strips are easier because they won’t fall out as easily when they get to the end. Cut the strips 1/2 in wide (or 3/4-1 inch for littles). I tried to give my students a variety of color to choose from, especially because we talk a lot about how the Navajo weavers weave in a pattern. When they choose their paper I want them to repeat a pattern of colors as they weave.
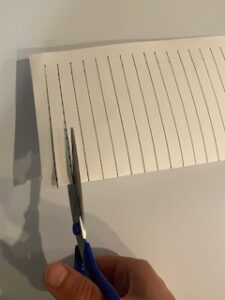
Step 3: Cut the loom
Now this is the trickiest part of the project, so be sure to have full attention and demonstrate it in front of the kids with clear directions. The kids will need to fold the loom in half hamburger style (just like you did when you were marking it) and then cut on the lines. The #1 error that kids make is continuing past the line and cutting all the way up to the edge of the paper! Be sure to stress that they can’t go past the line.
*Tip: trust me there’s always one student who cuts too far so have extra looms copied just in case. I’ve also used clear tape to fix the loom in a pinch.
After the loom is cut they will open it to look like this:
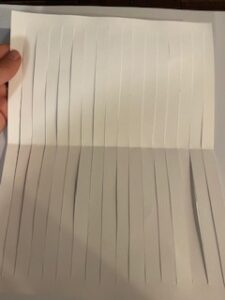
*Tip: This is the part where I have them put their names on the back. I don’t have them do it before cutting because their names always end up getting cut. They should write their name on the back across the short side of the paper. The long side is where the strips will cover.
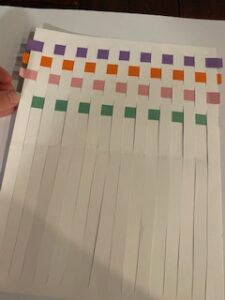
Step 4: Weaving!
Now for the fun! Our mantra for weaving is to go “over under over under over under…” When they start a new strip they must start in the opposite way of the strip before. If the last one started by going over then the next one should start by going under. Otherwise the strips will be loose and fall out of the loom. Be prepared for kids to be unsure at first and give lots of praise and encouragment. We always have a conversation beforehand about how new things can be hard at first and to keep trying! We also talked about how it’s okay to take a quick break if it becomes too frustrating. It’s amazing to see the natural weavers emerge, but the best part is watching those that struggle at first get better and more confident as they go along! You might need to walk around and help them push the woven strips up as they are added to the loom. That way they won’t end up with huge gaps between their colors.
Step 5: Glue and Trim
All right the last strip is in place and we are ready for the last step: securing the strips! Each strip of paper is woven in the loom, but the ends need to be glued down. Have students use a glue stick to glue each end of the colored paper strips to the end of the loom on both sides. Then they can take their scissors and cut off the ends that are hanging over the loom.
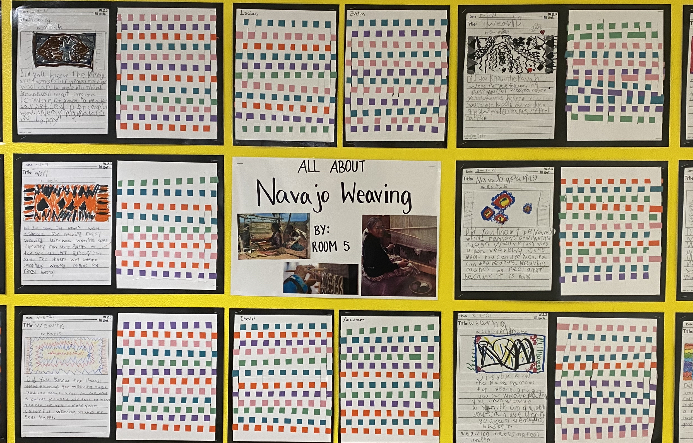
And there you have it! This is a great project to pair with a “How to-” writing. We then glued our writing and woven designs to a larger paper and had them laminated. The kids had a blast and used a ton of skills during this project! Of course we worked on comprehension and vocabulary while reading the story, but we also practiced writing, fine and gross motor skills, planning and patterns, stamina and resiliency, and a lot of growth mindset practice as well!
Have you tried paper weaving with your kids? How did it go?
Do you want to expand on this fun project? Here’s a few ways we expanded this lesson in my 2nd grade classroom:
1. Vocabulary and Comprehension
We read The Goat in the Rug and talked about vocabulary words specific to weaving such as strand, yarn, spinning, weave, and dye. For each vocabulary word we came up with a motion that reminded us what the word means (example: for strand we pretended to pull out one strand of hair). We also tried to connect weaving to ourselves. I had the kids become detectives and look at their own clothes. We tried to identify the strands that made up our shirt and we looked to see if we could find where the fibers were spun to make strands. The kids were fascinated that the evidence of what we were reading about was right their on their clothes! Making simple connections like this increased the interest in the story tenfold.
2. Connecting to the Story
We will work on the story all week long, and so I normally have a video to show the kids each day after we read the story. During each video they are to keep a lookout for any of our vocabulary words and if they hear one they show me the motion we associate with the word. If you’ve never seen anything being woven on a loom, it is fascinating and humbling to watch. The kids loved these videos that showed real life weavers in action:
This video shows the process of carding and spinning as well as weaving.
Navajo Rug Weaving- Monument Valley
This video shows some of the awesome patterns and designs that the weavers make, as well as the process of spinning and dying wool.
After I show the videos of the Navajo weavers, I think it’s fun to make a connection to regular kids just like my 2nd graders. This video is a news story that describes a talented boy who learned to crochet at the age of 5. (I don’t normally show to whole video because the end is just of the newscasters).
And lastly, why not make a connection to nature? The kids really love this video about weaver birds-this also connects to another 2nd grade Journeys story called Animal Homes. We talk about how amazing it is that the birds are weaving with their feet and mouth. I tell them that’s the same as them trying to tie their shoes with their teeth!
3. Writing
You can see in the picture at the top of this post that our weaving was paired with an informational writing assignment as well- All About Navajo Weaving. The kids needed to find 3 facts about the weaving process in the story and they were also required to use at least 2 vocabulary words in their writing. Their favorite part was the drawing of a Navajo rug. I displayed Navajo rugs on the smartboard and the kids picked their favorite and drew the design of the rug in the picture square of their writing.
We had a ton of fun with this project and the kids learned so much! Do you have any other ideas for weaving with kids? Tell me in the comments below!